Wednesday, 29 March 2023

NATO Division Commander - AAR


Last March  I bought a copy (well two copies)  of NATO Division Commander, which I'd lusted over back in the early 1980s. I managed to play the introductory scenario (focussed on Fire and Movement) relatively soon after, but it wasn't until July/August that I made a start on the first proper scenario - having reduced the rulebook to an 8 page QRS! Those first two turns didn't go too well, just so much to think of and so much clutter on the map that I struggled to get back to it, but dutifully left it out on my table, and even preserved the set-up when the tables went down for the Talavera game. 

With a backlog of "hobby" boardgames building up (Storming the Gap, Operation Dauntless), and a gap in figure wargaming whilst I painted up some ECW I decided to finish the 9 turn scenario. I started again last week, at about an hour a turn, and finally finished last night. By the end I was at about 30-40 min a turn (and remember the US only have ~ 9 fighting unit counters and the Soviets ~18!), partly because a may have been skipping less interesting activity but hopefully more because I'd got the QRS down to 2 pages.

The Soviets just managed a substantial victory (11VP vs a threshold of 10!), mainly by flowing round the US flanks and legging it for the exits hexes. A mad dash by 25TR and 28MR on Turn 8 from mid-board saw the whole of 7GTD exit the board. The US did lose 3 combat units (so ~ 33%) and most of their recce, and their HQs were looking very precarious by the end.


My play set-up, with the Mk2 PACs, one per side

So what were the good and bad points of the game (and bear in mind this is based on only 1 proper play):

The Good

  • Fatigue - the accumulation of fatigue in a non-deterministic way is nice, and emphasises the need to units to take breaks rather than fighting 24hrs per day
  • Intel- the need to get intel on a target before engaging with fires works really well, and how you allocate to sectors, and the slight bonus it gives you in combat (yet another table). Of course it would come into its own in blind play.
  • CSPs - the general application of Arty, Engrs, EW and CAS works pretty well - particularly the way each point is available for each phase in most cases. But see below.
  • The Night turn every 3rd turn again works well, restricting movement but making attacks marginally easier
  • The idea of Modes is cracking, and how they change  movt/cbt/ISR vulnerability. But see below.
  • The combat sequence is actually pretty straight forward, but just a bit to complex, and see below.


A 6 counter stack (just one unit plus modifiers!)


The Bad

  • It takes a lot of CSP points (mainly EW/Air) to grow permanent OpInt to the point where OpInt gives good results. The US have a LOT of air so get there quite quickly, for the Soviets it's almost mid-game. Was Soviet ISR really that bad?
  • Calling Fires "Counter-Battery" is just very confusing!
  • Fires are very ineffective, especially with low INT (which would be OK if not for the point above). A whole Div Arty Group can fire on a single target and not do any real damage!
  • The Mode change system with CPs is horrendous. The numbers asked for are deliberately high (ie beyond what you will have in a turn) so forces you onto the next table - why not just restructure that 2nd table. I replaced it with a move penalty, but may go for a simpler SP option if I play again as it forces you to use HQs properly.
  • The need for 4 CRT tables, of which you consult 2 or 3 for each attack is several too many.
  • Its not clear what the difference is between the 5MP Hasty Attack and bein gin Hasty Attack mode. 
  • HQ's seem relatively immune from attack, which is odd given the emphasis on C2. That said I didn't play the active EW rules which can disable HQs, inhibiting their SP/CSPs and placing units OOC.
  • Like any hex game it suffers from hex play - getting your attacking units just so around the target. That said at least its a differential CRT.
  • Counter stacks can be tall - 6 counters! See photo. I think I'll push most onto a PAC/rosta next time.
  • Overruns should be more vicious, -3 or -4 rather than -2. As it is even small 1 or 2 str units have 6 T/O but lose max of 2 per cbt even in an overrun so can hold up a huge force 

My Mark 1 PAC


Conclusion

Do I like the game enough to play another scenario as-is? Probably not. The issue to me is that it has all these great C2 innovations, then gives you a relatively complicated combat process, so you get two complex games for the price of one. And the board clutter really doesn't help.

What's next

So to "improve" the game, or at least the game experience there are a number of things I have in mind, some minor, some major. Roughly in order of size:

  • Use PACs/rostas to track most unit values - just leave Mode on the table.
  • Upgrade Fires
  • Upgrade overruns
  • Make HQs more vulnerable - keep them on the move (we used to move at least every 24 hrs at Bde).
  • Simplify the combat tables
  • Introduce a streamlined SP/mode change system

And then I need to start playing the EW and Ammo rules, and then the Commander rules!

It will be interesting to see how more modern games like Dauntless and Storming the Gap compare.

And that second copy? I might now finally find the time to put it on eBay (it's all sorted and ready) to recoup some of that initial outlay!

Finally, here's the turn-by-turn photos.


Initial setup


End Turn 1


End Turn 3


End Turn 4

End Turn 5


End Turn 6

End Turn 7 - first Soviets off


End Turn 8 - Soviets off the board building

End Turn 9 - Endex


Friday, 24 February 2023

The Battle of Talavera, July 1809


This weekend Adrian, Nick and I hosted a 2-day Battle of Talavera wargame down in Brockham, Surrey, at the same school hall we used for Waterloo in 2022 and 2021. We had 9 players and I umpired.

The original Battle of Talavera took place on 28-29 July 1809 when Wellesley's British and Cuesta's Spanish marched on Madrid. Wellesley was wary of supply lines and being cut off by Soult, and Cuesta waivered between being over-cautious and over-enthusiastic. Having met up just before Talavera, Cuesta raced on ahead and bumped into King Joseph Bonaparte's two Corps army. Cuesta pulled back, and was eventually persuaded by Wellesley to join him in a stand at Talavera. The Allies mustered around 56,000 troops, and the French around 56,000 (with more cavalry and artillery).


Terrain and Tables

The Halford rubber 2' x 2' mats had worked well for Waterloo so I bought 18 more boxes of the (6 tiles per box) and spent December and January painting, cutting and flocking them. We were keen that this looked like a Peninsular battle and Adrian had spent a lot of time in his parched lawn back in the summer getting the correct flock mix for dry grass! Half the table is dead flat, and the other half is dominated by the Cerro de Medellin/Cascajal ridge line, and then at the very top (North) the heights of the Sierra de Segurilla (8 tiles deep!). I used the excellent Spanish Ordnance Survey equivalent to get the basic terrain shape (not helped by the Spanish building a motorway and flooding the upper valley!), and then adjusted according to accounts. A lot easier terrain to build than Waterloo, and no need to use felt for a "level 0". The only other real terrain features were 8 tiles worth (so about 6' x 6') of olive groves and vines. Nick roped his wife in to help build the vines from twisted strings, whilst I stuck foilage clumps onto suitably mossy sticks. We were pretty happy with the result, and even happier when I scattered sage and oregano from Marie's stock cupboard to give the ground a nice natural fallen-leaves look.

Spanish advancing through the vines/groves - the Medellin in the distance

The playing area was the same 20' x 12' as Waterloo (at 1mm = 1 yd). The problem with big battles is always how to do then arrange the tables so you can a) reach and b) don't fight every engagement between two table edges. We did think about having the Portina (the dry brook that runs N-S and served as the main point of contact) on its own table, 2 tiles wide ('6) and 20' long, and then having thinner tables behind each side (and in retrospect that may have been better) but in the end we went for four 12' tables orientated EW, the southern 4' x 12' table having Talavera, the second 6' x 12' table with the Pajar de Vergara hillock, the third 6' x 12' table with the Cerro de Medellin, and the fourth 4' x 12' table having the Sierra de Segurilla. That layout worked fine, it didn't seem too broken up, there were few cross-table engagements, and at the end we could push all the tables together for the photos.

Pink lines show table boundaries.


The Rules

We used Steady Lads Steady, my "house" rules, designed to work on grids. We used these for both Waterloos (as well as lots of our own games) and most players had used them at the last Waterloo, so by the end of the 1st day I wasn't being called upon too much for basic calculations. They are probably a bit more complex than Shako/GdB. Rules reflections at the end. The whole terrain is marked with dots every 10cm/100yds to delineate the square grid. Damage is in Strength points at the battalion level (no figure removal) with 18-20 figure battalions (20mm figures, mix of plastic and metal - Newline). Figures are on 2-4 figure bases, but held in Bn sabots to make movement easier. Each Bn has a (removable) small ID strip with unit name, movement, strength and quality values, first fire indicator, and tally boxes for damage - you can just see them as a pale strip at the back of the base in the pictures above. The sabots were all custom made for us by Jim Moore at Products for Wargamers and have a double depth back strip to make mounting of the ID strip easier - he does a cracking service! 

BTW Adrian painted up the whole of the Cuesta's Spanish Army between us deciding to go ahead with the game in September and the game itself! In comparison I only managed Leval's German Division and the Polish troops - the Westphalian Chevaux-Legere being completed the day before the laydown!

Scenario

At the actual battle there was a night attack by Victor to try and seize the Medellin. We gave the French the option of that but they declined (mainly I expect as it didn't really help the game VPs as we didn't want it to upset all our careful terrain and deployment planning!) We might run it as a separate game later - our plan was to do it double-blind with some randomisation of movement to reflect the problems of a night assault on very rough ground.

The Allies were allowed 600m of movement on historic deployments, the French 1200m but both had to keep within their historic limits. Brigades from both sides started on blinds unless within 600m. There were also a number of false blinds they could deploy for deception. This was very much a battle were each side wanted to get the better of the other, but not losing too many of their own troops in the process, for VPs were purely around the delta in Brigade kills. Turn 1 was 0500 (there was the option to start later in the day but both sides wanted to get cracking) and turns were very roughly 45 min (and about 45 min in real life!)

On the map above the Allies were arrayed the W (left) edge of the Portina, with the Spanish to the S and in Talavera, whilst the French were arrayed long the E edge of the Portina. Neither side was allowed N of the Medellin/Cascajal.

End Turn 2 - almost everyone still on blinds (White for Spanish)

How It Played

The French went straight into the attack, pinning Wellesley to his front whilst sending much of Victor's corps into the valley on Wellesley's flank. This was meant to be just a diversion, whilst the French Reserve pushed through a hopefully weakened Allied centre, right on the Spanish/British boundary N of the Pajar. The French being first across the northern valley meant that it was they that got the disorders as they crossed the gullies hidden in the long grass (and on a hidden map). The French managed to take the Valdefuentes farm, but the British pulled slightly back and established a solid line. Sebastiani tried a frontal assault in column across the Portina ravine but was suitably historically seen off by volleys from the solid British and KGL line. 

British and KGL line the W side of the Portina ravine


However on the southern flank there was a big and early melee between Milhaud's dragoons and the Spanish heavy cavalry in the vineyards and olive groves, which the Spanish won! (Nick's dice rolling and coming down with COVID possibly not helping!). This set the tone for an above average by the Spanish - discussed more below. With the vineyards clear of French troops the Spanish army started advancing through them to the N with the aim of rolling up the French flank. 

Spanish cavalry pushes N through the vines


At around this point the French started calling for a truce - as allowed in the scenario rules and has happened for about 7 hours in the real battle! The British opposed it, so it took 2 turns for the French to get the right dice roll, and then could only hold onto it for 2 turns, allowing recovery of order and some recovery of strength.

As the truce faded a steady battle got underway around the Pajar, and Leval's German, Dutch and Polish troops fought a valiant delay action whilst the French reserves came in to stablise the situation - but now no longer able to commit to a counter-stroke. Victor was pullling back from the N flank but too late to make a difference. In the dying turns of the day and game the dry grass started to catch fire and lots of little plumes of smoke was soon making squares off limit to troops and blocking visibility (as happened in the real battle).

Poles and the French reserve block the Spanish exit from the vineyards - Talavera in the distance.


At turn 18 is was decided to draw stumps and call ENDEX, as no brigades (the currency for victory points) where at immediate risk and both lines were reasonable firm. Totting up the losses showed a marginal Allied victory (so probably close to reality), although the French were adamant that there reserves would make micemeat of the ubermensch Spanish!

ENDEX - the top 3 tables pushed together

Reflections


In terms of admin and the overall run of the weekend eveyrthing went to plan and I think a good time was had by all. Having Andrew Field (the author of THE book on Talavera) as King Joseph meant that we got lots of insight into the battle, and lots of discussion about military history vs wargaming - particularly where the Spanish and C2 were concerned! 

As a result whilst the rules worked well overall there are a few changes I'll look at before the next battle:

  • Splitting Troop Quality and Unit Size back out into two values. I'd conflated the two to reduce a step in calculation, but the large Spanish units over-balanced the reduce Spanish TQ too much - so will re-separate them
  • Adding in some form of Brigade Orders and a throw to change orders based on Commander Quality and Commander Boldness. This seems to be working fine in my medieval games - but the trick with lots of players will be balancing player agency with historical friction. I can't see the Spanish players having such a good game!
  • Slowing down Foot Artillery - despite not being able to move and fire in a turn it was still used a bit like a tank. Just ordered Webber's Peninsular Journal to see if it gives any more insight. Tempted to go for a full move to unlimber. The new artillery ammo rules (low on double blank, out on 2nd double blank, resupply by ADC card) worked reasonably well.
  • Increasing cannister effect, the +2 just isn't enough, might make +3 or even +4!

The next big Napoleonic game won't be for 12 months (and likely to be Fuentes d'Onoro in Spring 2024 - let me know if you'd like an invite) so lots of time to try out some other rules for comparison (particularly General d'Armee 2 when it comes out) and to do some test games of our own rules revisions.

Thanks to all who played and attended and made it a great weekend. It was lovely to play a Peninsular game on something that looked like dried grass rather than a lush European field!

You can follow us on Facebook if you want to find out more about our future games.

Photos

Finally, some of my other favourite photos from the game.

The Battle for the Vineyard

Just N of the Pajar - note the smouldering grass fires

Looking NE from the Medellin to the Cascajal

Looking SW from the Medellin to Talavera and the vineyards

The fight around the Pajar - note all the empty space here and elsewhere!

Spanish cavalry charging French infantry - the cavalry typically came off worse

The fight around the Pajar again, looking N

Players in full flow

The Spanish caught in early morning sun

The British line awaits

The 4th Baden Regiment attacks, supported by Nassaus

The Westphalian Chevaus-Legere reforms after a successful charge

Spanish Infantry emerging from an olive grove

The Hesse-Darmstadt Gross und Erbprinz Regiment supported by the Frankfurt Battalion

British and French face off across the Portina Gully

Where the dry Portina river becomes a wet gully, full of black snakes!


Sunday, 5 February 2023

Vertical Urban Wargame - Summary Report


Vertical Urban Wargame was my game for Wargame Development's VCOW 2023 virtual conference held 3-5 Feb 2023. This post provides a summary and overview of the game, and I may do a second post to go into more detail on its genesis and design - and both will then be condensed down for my Onside for the Nugget (WD's journal). The game was set as a notional 1985 engagement in Berlin between Blue and Red, with a Company Group Blue force, and a slightly smaller Red Force.

Aim

The aims of the game were:

  • to explore if/how a "vertical" (i.e. point-of-view table level) viewpoint changes the experience of a wargame - particularly an urban one;
  • to see whether consumer grade systems (phones, bandwidth, video conferencing software) are up to the task;
  • to have some fun on a Friday evening!

Game Set Up

I chose to use Dropzone Commander as the rules, with stats modified for 1980s. I chose these as they are pretty simple and had been used by Dstl in some of their own work. The players weren't given the rules, just a rough sense of engagement distances on the model for the various weapons. I rolled all dice and didn't bother to measure movement (although I had guidelines) and typically moved units in tactical bounds.

The terrain was built from two sets of Dropzone buidings (Cityscape and Ruinscape) which at c.£30 each are a wonderfully cheap way of building city urban terrain. The buildings are all fold-flat, and the pack also includes the 1ft street tiles. Each pack is designed to provide 6' x 4' of playable space with reasonably open urban terrain, I found that two packs wasn't quite enough to do a dense 6' x 4' table! Models were 10mm Timecast, with 10mm Pendragon civilians.

Tech Set Up

I looked at various options for the cameras and stream but decided in the end that the best bet was mobile phones for the cameras, with each feeding its own video conferencing room in Jitsi (a free open-source Zoom clone). The nice thing with Jitsi is you just name a room (e.g. VerticalWargame1Pl) and give players the URL to that room, and then they can go straight into it with their browser - no download, no sign-up, just straight in. One issue was initially I'd hoped to have the phones vertical so as to make them easy to use and get the cameras really close to the ground, but all the conferencing software I tried kept trying to re-invert the image - so it was always upside down. So the phones had to be on their side, which kept a lowish camera but meant they didn't fit down the streets so I had to keep moving the buildings out of the way! Something to improve on.

Camera set-up, with a simple balsa holder to keep vertical


We used Zoom to start the session with video on whilst I gave the briefing. Once that was over we switched video off and used it effectively as the Coy radio net, and the players (two teams of two) called up the Jitsi feed from their AFV. The Coy Comd had no video (as he wouldn't in real life in 1985) and had to rely on audio reports. 

This screen capture from a test game shows the two JITSI feeds running on one screen, plus an overview via Zoom.


Scenario

The game had 2 1/2 phases:
  • Phase 1: Each team had a single Scimitar recce tank to try and find a route through the city to the 3 objectives, and then report this route back to the main force. The real aim of this was to get players used to the tech and mechanics;
  • Phase 2.1: Each team now controlled a Platoon Group, each of 1 Pl and 1 Chieftain (one player controlling each but sharing a single camera in each team). The aim was to secure and hold 2 of the 3 objectives.
  • Phase 2.2: At some point during Phase 2.1 I allowed the Coy Comd to start tasking a choice of UAVs, and the option of calling forward a reserve Pl Gp.

The company moves off in line astern!


How it Played

The Coy Comd immediately took charge and had the two Scimitars work out where they were in relation to each other (I put them in on different axis 90 degrees apart!) and to team up before pushing forward in a mutually supporting way (something that the solo playtesters hadn't bothered with, but far more sound tactically). 

Scimitar starts its patrol.

Note: All the images in this section are in-game screen grabs from Jitsi by Ian Robinson.

A hunt of the streets finally found the objectives - which relied on getting close enough to actually read the signs! A Red recce BRDM and BMP were soon dispatched, but then the T72 appeared! Time to fire the smoke and scoot back home.

Friends or foes? One of the few long avenues in the city.


For Phase 2 the Coy Comd decided to send both Pl in on the same axis. At the first junction they them split, one going L down the earlier route, and the other going R across the main square (with a fine 28mm statue in the centre) so as to effectively pincer the closest two objectives. Just to add some more fun there were civilian groups scattered around acting under a simple paper AI, and although painted in bright colours, at a distance, through a smartphone, they were often misidentified at Red soldiers, and narrowly avoided being gunned down. Between Phases 1 and 2 I'd also blocked off a couple of routes with improvised barricades made of ISO containers.

2Pl Chieftain engaging T72s in the murk


Red and Blue arrived at the objectives at about the same time. A tank duel between two T72 and a Chieftain by the main square was eventually won by the Chieftain (despite a T72 getting first shot as it wasn't spotted through the camera). By the Mayor's Office 1Pl dismounted and occupied a neighbouring building as Red rushed the Office. 1 Pl Carl Gustav took out one BMP, and it's Chieftain the second (I think). I then gave the Coy Comd the choice of a mini-UAV overflight of the whole city or a micro-UAV flight along 8ft (8 tiles) of street at building height. This was the first view he had of the city and situation and significantly lifted his situational awareness. 2 Pl realised that it could get in the back of another neighbouring building to the Mayor's Office, and narrowly avoided hitting 1Pl as both fired on the same BMP from opposite directions. 2Pl stormed the Mayor's office and took, it, 1Pl then rush across the street and to their surprise found themselves in the back of the Police Station just as Red moved in from the front. A quick firefight and the Red section was dispatched and it was game over.

2Pl spies the BMP, engages with CG - just missing 1Pl in the building beyond!


For a fuller sense of the terrain, engagement sites and final deployment there's a short fly-through video on YouTube.


Conclusion

I'll do a fuller set of conclusions and lessons learnt in the second post, but everyone reported having a really fun game and a far more visceral experience than if we'd played the same game over an open table. There was a real sense of trepidation each time a unit poked its front around a corner to see what was there, and spotting targets and identifying friend from foe from civilian was also a real (and realistic) challenge. Several players have now remarked how much the whole experience resembles a tank-based dungeon crawl, with high engagement and emotion. 

So given the initial question "if/how a "vertical" (i.e. point-of-view table level) viewpoint changes the experience of a wargame - particularly an urban one;" the ad-hoc, single experiment answer would seem to be that a) it does and b) for the better by making the whole experience more visceral and more "realistic". I might have to switch into PhD mode to more critically examine that and perhaps start running some versions of the game under proper experimental conditions!


Friday, 20 January 2023

ChatGPT meets Wargaming and the PhD

Had to be done, here's ChatGPT's evaluation of urban warfare.


What are the main challenges for an army fight in an urban environment?

There are several main challenges for an army fighting in an urban environment, including:

  • Limited visibility and cover: Buildings and other structures in urban areas can block soldiers' line of sight, making it difficult to spot and engage the enemy.
  • Close-quarters combat: Urban areas are often densely populated, which means that fighting will take place at close range, making it difficult to use heavy weapons such as tanks and artillery.
  • Collateral damage: Urban areas are often densely populated, which means that there is a risk of causing significant civilian casualties and damage to infrastructure if heavy weapons are used.
  • Guerrilla tactics: Insurgents or enemy forces may use guerrilla tactics, such as hit-and-run attacks and booby traps, making it difficult for an army to maintain control of an area.
  • Lack of intelligence: It can be harder to gather accurate intelligence in an urban environment, as the enemy may be able to blend in with the civilian population, making it difficult to identify and locate them.
  • Logistics: Urban areas are often densely packed and have limited road networks, making it difficult to move supplies and reinforcements in and out of the area.


And here's its thoughts on my PhD topic.

What are the main challenges in developing a wargame of urban conflict?

(thought a lot longer, but may just be load)

There are several main challenges in developing a wargame of urban conflict, including:

  • Modeling the complexity of urban terrain: Urban areas are complex and dynamic environments, with a wide variety of structures, buildings, and infrastructure that can affect the movement and visibility of troops.
  • Representing the impact of collateral damage: Urban areas are densely populated, which means that the use of heavy weapons can cause significant civilian casualties and damage to infrastructure. This needs to be accurately represented in the wargame to reflect the real-world consequences of military actions.
  • Incorporating the human dimension: Urban areas are often home to diverse and complex human populations, which can affect the conduct of operations. This includes understanding the population dynamics, cultural, and political factors that affect the behavior of the civilian population, and the military-population relationship.
  • Balancing realism and playability: Urban warfare is a complex and challenging environment, and accurately representing all the elements of urban combat in a wargame can make it less accessible and less engaging for players. Finding a balance between realism and playability is crucial to creating an engaging and meaningful wargame experience.
  • Incorporating the new technology: Urban warfare often involve the use of a variety of technology, such as UAVs, Robotics, AI, and cyber warfare, which can be tricky to simulate in a wargame.
  • Representing the legal and ethical considerations: Urban warfare often raises legal and ethical issues, such as the protection of civilians, the use of weapons in populated areas, and the occupation of territory. These considerations need to be incorporated into the wargame to provide players with a realistic and nuanced understanding of the complexities of urban warfare.


Prepping Vertical Dropzone Commander

 For Wargame Development's VCOW virtual conference at the start of February I'm planning to do a "vertical" wargame, where players (Pl Comds) get a table-level web-cam view of what is going on as they try and fight through the city. Played through DZC a few times and done some 1985 stats for it. And here's a couple of images from the technical testing. Will test with some remote players next week.

Chieftain on the prowl - pity I haven't got the Berlin Brigade urban cam

The two platoon cams, plus an overview cam

Onside report after the event.


Thursday, 27 October 2022

Company Megatest - Fireball Forward!


Seen the ads for this set for ages in MW&BG so had to give it a try. It also has a Stalingrad scenarion pack which might be interesting for the PhD. Oh and Little Wars TV has just done a head to head between Fireball Forward and Crossfire - see https://www.youtube.com/watch?v=e3tvgM3_-UE

Presentation

I got the 110pp PDF, which has about 56 pages of rules, optional rules and design notes (!), 26pp of scenarios (13 scenarios), an index (!), 8pp QRS and 11pp of stats - so a pretty full package for $25. Rules are pretty well laid out, line drawing not photos, lots of short examples. My only niggle is that there is a short of quick intro to the whole rules at the start and actions at each phase, but further rules for the actions are later on, so I was always diving backwards and forwards. The RQS also seems to miss some key elements (even if simple) like Morale.
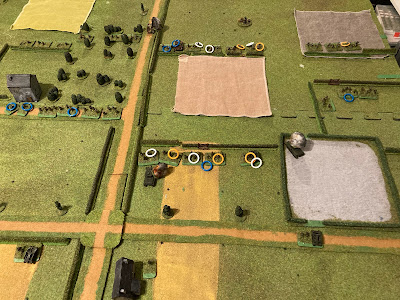
Artillery Stonks from both sides causing a lot of issues!

Set-Up

I used the Choctaw Warrior scenario as the base for my game, beefing the allies up to a Coy+, and giving the Germans some extra MGs and tanks. Germans attacking from the top of the table.

How It Played


The lead P.IV got taken out by the Cromwell as it reached the wood, but the second P.IV managed to take out both of the Cromwells and settled down to providing fire support. A to-and-fro battle for the wood on the L lasted almost the whole 7 turns, with close assaults by both sides but the British ended up in possession. A German attempt to flank L of it was caught by an arty stonk and never progressed. On the R flank platoons traded shots for most of the game, the Germans only belatedly trying to push across the gaps between the hedgelines once their IG started providing support. Unfortunately their Pl Cmd bought it, one section faltered, and one was already Broken so the remaining section to make contact couldn't really achieve much. 

The centre was far more touch and go. An early British stonk caught the Germans forming up, but then a couple of German stonks, and the fire support from the P.IV started to weaken the British line enough (crucially breaking the UC Bren teams that had been brought up to support) and in the final moves the Germans tried to push across the open ground. They'd did their best to suppress any fire, but in the end only the Zug Cmdr reached the hedgeline - to be faced by only the British Pl Cmdr left defending it! And that was the end of Turn 7 so we'll never know which of them won!

In terms of losses the British only had 2 elements KO'd, compared to the German's 5. Both sides lost one Pl Comd. In terms of holding the line the British succeeded, holding both flanks quite securely, and with enough Broken troops to put into the fray if the German commander won his melee!


The fight for the wood

Rules Impression


Unlike some of the rules I've tried recently which have been pretty vanilla Fireball Forward has a lot of novel mechanics and ideas, all of which work, but which possibly aren't as elegant as they could be. So I'll actually step through the key mechanics.


Activation

FF uses a standard deck of cards, shuffled, with Germans activating on black cards and British on red. You draw cards until the colour changes, and the person who's colour it is must then decide order of activation for that many units, so you can't change if things go wrong on the first activation. At first I found drawing then replacing the colour change card a bit odd, but in the end I found it gave a nice Bolt Action type mix of long and shorts spurts of action but without special dice or drawing chits. I used to be really keen on the 1 card = 1 specific unit model to get the extra friction, but certainly for mech games I think its reasonable to let the commander choose the order so as to try and bring off integrated attacks. Having thought more about the card deck approach the more I think I might use it on my next CWO game, with a few further tweaks to introduce some morale orientated friction.

There are also "initiative chips" (1 or 2 per game, but some multiple use) which give you extra activations. Nice.

C2

Good units can take actions automatically, basically one or all of Spot (leaders), Rally, Fire, Move, in any order. Broken units have to take a Rally test first (3+ if by a 3+ leader, otherwise 6+). Any suppression is removed automatically - which really limited the effects of suppression, see below. When the platoons lost their leaders then the 6+ really meant that Broken units were out of the action and the Platoon ceased to work as a cohesive unit, which seemed reasonable (although FF does use extreme terms, Broken is really just "Shocked" and Rout - when a freshly Broken units falls back - is really just Pull Back).

Spotting

You need a basic spotting check (5+) to spot hidden units (default state at start) before you can fire on them. Auto within 3". No DMs.

Movement

Movement distances are as-the-crow-flies. As long as your route doesn't move beyond this radius you can take any route to your destination (although subject to Opportunity Fire).  Terrain is dealt with by allowing a maximum of 2 "zone" crossings in a move, such as two hedges, or a part of a wood divided into 3 or 4 zones. This does bring a nice fluidity to the movement and gets away from the false precision of a 8" or 12" move. Might be tempted to use it, plus maybe some variable element to still increase uncertainty.

Firing

This is where FF fails I think. When you fire you roll at least 3 dice (4 for MGs/Guns) these being your normal damage dice (typically needing 4+/5+ to hit), one or more "hit dice" (needing an invariable 6 to hit) and a range dice (which can be a single D20, or D4+D8 or other weird combinations). MGs and guns roll another D6 for ammo/stoppages. With bigger guns and HMG you could be rolling 7 dice or so, a mix of D6 and other types, the D6 in three different colours! Just looking that up each time and then finding where the dice are on the table just really gets in the way of the flow (although if its just basic rifle fire then you tend to just hold the 3 dice needed in your hand the whole time). The range dice is there both to give variability in range (your range is range dice+ a basic range for the weapon), and to give a short range effect (+1 if range < just the range dice). There are some very basic DMs.

For each hit you take a morale check, typically 4+ for separated unit, 3+ for leader or unit adjacent to leader. Lose 1 check and you are "broken" and pull back to cover and out of LOS of enemy, upto 12", two losses and you're dead. I found the pull-back very unnatural - from what I've read the pullback is more likely to be a Pl level thing, sections just going to ground if they are being hit and pinned. With an element now 12" behind you the Pl Comd then has to decide whether to spend a turn moving back to help them rally on a 3+, or leave them trying for a 6+, again in contrast to what I usually read of the Pl Comd and Sgt running along the line to motivate people.

Any hit means you are suppressed, so no opportunity fire, but you automatically lose suppression when activated - so if you try to suppress with one Platoon from the front and then charge with another Platoon on their activation the target is only suppressed if the opposition hasn't had an activation between them to recover suppression.

Opportunity fire works in the same way, but doesn't cause suppression which seems odd - surely its normal effect is to get a moving unit to dive for cover. It also wasn't clear to me if a unit could do Opportunity Fire and normal activation, or even multiple opportunity fires.

Anti-tank fire is a bit simple. D6 plus a range dice, hitting again on around 4+/5+. The tables give the "penetration" points and the defender rolls D6 per armour point - but saves are then a complicated none for 1s, 1 for 2s-5s and 2 for 6s. Anything not saved means KO, and a morale test if equalled.


Close Assaults

Close assaults are relatively simple, Morale check to commit, then pair off, D6 each and a couple of DMs. In practice I found that if a Platoon charged forward you'd be lucky to get 50% of the Platoon actually committing (looking for 3+ for 3 units, 4+ for the winger), which again doesn't quite seem right, more likely all or nothing as otherwise you get one section stranded - but guess that happened, just not as often as in the game? Loser takes morale checks equal to the delta in modified die rolls.


Indirect Fire

Each side gets a number of missions, no discrimination between mortars and guns. FO needs a Morale Check to call in, if successful then roll on a 2D6 table for the result, 6-10 on target, lower is bad news (delays, deviation), higher is good news (double impact etc). Very basic.


There are extra rules for things like Grazing Fire/Beaten Zones,  Snipers, Mines, Air Support, fanatical Soviets, jungle and even small boats and horses but I didn't play any of them.
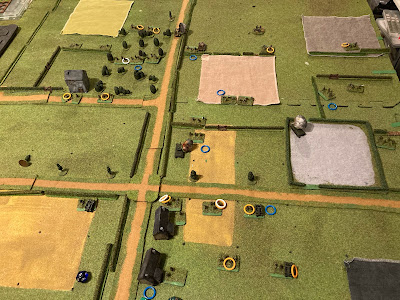

ENDEX

Conclusion


So some different ideas which is good, but some work, some don't. Trying to "house rule" it to fix is probably too big an ask as the direct fire system is just too clumsy for my liking. No issue with the multiple morale check principal though. In reality I think I'll just steal the bits I think I can work with. Overall I guess 7/10.