Showing posts with label ww2. Show all posts

Thursday, 23 November 2023

Battalion Level Rules Megatest - WW2


In October/November I've started on my Battalion-level mega rules test for mechanised rules. I started with those rules aimed primarily at WW2. I set up the Cristot scenario from O Group and played it through with 3 different rules sets, plus my own. As previously noted many of the Coy level rules - see  https://newconverj.blogspot.com/p/rules-reviews.html - would also work at Bn, as will some of the Bde level ones in due course.

Since most of my time is being sucked up by the PhD I've just done this one omnibus, note form, post for the playthroughs. The Modern Battalion rules should be tested 1H24.


TLDR: O Group is the set to go for!


O Group

108pp soft-back, 4pp QRS

How It Played

- Germans deployed well fwd, with A/T gun trained on road and PzrSchrk team in wood by road.

- British went for a broad advance, but A Coy (W) hesitant at start.

- On E flank B Coy came under fire fm farm, laid smoke, moved across neighbouring field and into MG ambush. Never really recovered initiative as battle focussed on W

- Once A coy got act together advanced to wood line, but 3 Pl sent home by en fire. 2 Pl stormed the farm house, took flanking fire but go through, and after couple of rounds melee took farmhouse. 

- German I. Coy tried to counter but pl defeated by fire and pulled back to wood. Germans deploy res pl and MG team into wood. Firefight with farm whilst British move 1 Pl up and Carrier Pl to enfilade the wood

- Meantime Sherman/Cromwell tps move up, but hit by the A/T ambush. The 2nd troop lasts longer, Panther Pl deployed, fires and misses, and PzrShrck firing on flank gets the final kill

- German II Coy pushes fwd W of the road against minimal opposition, risking flanks of both British thrusts

- Germans bring down mortar fire on farm, but twice get OOA. British take several turns to get Fires, but finally bring down couple of turns fire on the woods, which combined with the MG fire finally starts to get KIAs and I Coy effectively wiped out. 

- Called time. ~Turn 10/16. Probably still in balance but unlikely that Brits would get 50% of Cristot in another 6 turns, esp with II Coy fwd

Pros

- really emphasises bn level

- simple die rolls (everything is 4+), rolls+DMs easily memorable

Cons

- shock->suppression->KIA takes time to build up - realistic (in some cases)?

- quite abstract rolls (but Bn)

- confusing terms (orders, unit etc)

- Index, but page numbers hidden in spine

- not 100% logical layout


Possible Improvements

- Smoke on any arty/mortar impact squares and no other firing into before or after

- 4+ for opportunity so 50:50?

- Coy morale?

- Use a Suppress markers once get to 3 shock for less clutter and to emphasise

- Redeploy of sp wpns?

- Use tanks as individuals not sections? Else put on larger bases to emphasise.


Overall

Really nice set of rules. Certainly preferred them to Chain of Command and think the way that the patrol bases works is really good and well worth stealing. The set to beat at this level? 9/10.


Thursday, 27 October 2022

Company Megatest - Fireball Forward!


Seen the ads for this set for ages in MW&BG so had to give it a try. It also has a Stalingrad scenarion pack which might be interesting for the PhD. Oh and Little Wars TV has just done a head to head between Fireball Forward and Crossfire - see https://www.youtube.com/watch?v=e3tvgM3_-UE

Presentation

I got the 110pp PDF, which has about 56 pages of rules, optional rules and design notes (!), 26pp of scenarios (13 scenarios), an index (!), 8pp QRS and 11pp of stats - so a pretty full package for $25. Rules are pretty well laid out, line drawing not photos, lots of short examples. My only niggle is that there is a short of quick intro to the whole rules at the start and actions at each phase, but further rules for the actions are later on, so I was always diving backwards and forwards. The RQS also seems to miss some key elements (even if simple) like Morale.
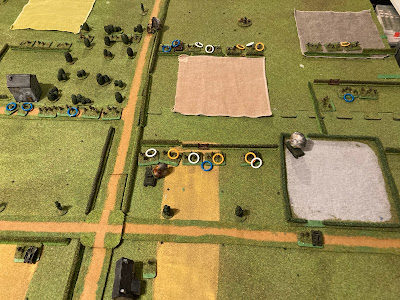
Artillery Stonks from both sides causing a lot of issues!

Set-Up

I used the Choctaw Warrior scenario as the base for my game, beefing the allies up to a Coy+, and giving the Germans some extra MGs and tanks. Germans attacking from the top of the table.

How It Played


The lead P.IV got taken out by the Cromwell as it reached the wood, but the second P.IV managed to take out both of the Cromwells and settled down to providing fire support. A to-and-fro battle for the wood on the L lasted almost the whole 7 turns, with close assaults by both sides but the British ended up in possession. A German attempt to flank L of it was caught by an arty stonk and never progressed. On the R flank platoons traded shots for most of the game, the Germans only belatedly trying to push across the gaps between the hedgelines once their IG started providing support. Unfortunately their Pl Cmd bought it, one section faltered, and one was already Broken so the remaining section to make contact couldn't really achieve much. 

The centre was far more touch and go. An early British stonk caught the Germans forming up, but then a couple of German stonks, and the fire support from the P.IV started to weaken the British line enough (crucially breaking the UC Bren teams that had been brought up to support) and in the final moves the Germans tried to push across the open ground. They'd did their best to suppress any fire, but in the end only the Zug Cmdr reached the hedgeline - to be faced by only the British Pl Cmdr left defending it! And that was the end of Turn 7 so we'll never know which of them won!

In terms of losses the British only had 2 elements KO'd, compared to the German's 5. Both sides lost one Pl Comd. In terms of holding the line the British succeeded, holding both flanks quite securely, and with enough Broken troops to put into the fray if the German commander won his melee!


The fight for the wood

Rules Impression


Unlike some of the rules I've tried recently which have been pretty vanilla Fireball Forward has a lot of novel mechanics and ideas, all of which work, but which possibly aren't as elegant as they could be. So I'll actually step through the key mechanics.


Activation

FF uses a standard deck of cards, shuffled, with Germans activating on black cards and British on red. You draw cards until the colour changes, and the person who's colour it is must then decide order of activation for that many units, so you can't change if things go wrong on the first activation. At first I found drawing then replacing the colour change card a bit odd, but in the end I found it gave a nice Bolt Action type mix of long and shorts spurts of action but without special dice or drawing chits. I used to be really keen on the 1 card = 1 specific unit model to get the extra friction, but certainly for mech games I think its reasonable to let the commander choose the order so as to try and bring off integrated attacks. Having thought more about the card deck approach the more I think I might use it on my next CWO game, with a few further tweaks to introduce some morale orientated friction.

There are also "initiative chips" (1 or 2 per game, but some multiple use) which give you extra activations. Nice.

C2

Good units can take actions automatically, basically one or all of Spot (leaders), Rally, Fire, Move, in any order. Broken units have to take a Rally test first (3+ if by a 3+ leader, otherwise 6+). Any suppression is removed automatically - which really limited the effects of suppression, see below. When the platoons lost their leaders then the 6+ really meant that Broken units were out of the action and the Platoon ceased to work as a cohesive unit, which seemed reasonable (although FF does use extreme terms, Broken is really just "Shocked" and Rout - when a freshly Broken units falls back - is really just Pull Back).

Spotting

You need a basic spotting check (5+) to spot hidden units (default state at start) before you can fire on them. Auto within 3". No DMs.

Movement

Movement distances are as-the-crow-flies. As long as your route doesn't move beyond this radius you can take any route to your destination (although subject to Opportunity Fire).  Terrain is dealt with by allowing a maximum of 2 "zone" crossings in a move, such as two hedges, or a part of a wood divided into 3 or 4 zones. This does bring a nice fluidity to the movement and gets away from the false precision of a 8" or 12" move. Might be tempted to use it, plus maybe some variable element to still increase uncertainty.

Firing

This is where FF fails I think. When you fire you roll at least 3 dice (4 for MGs/Guns) these being your normal damage dice (typically needing 4+/5+ to hit), one or more "hit dice" (needing an invariable 6 to hit) and a range dice (which can be a single D20, or D4+D8 or other weird combinations). MGs and guns roll another D6 for ammo/stoppages. With bigger guns and HMG you could be rolling 7 dice or so, a mix of D6 and other types, the D6 in three different colours! Just looking that up each time and then finding where the dice are on the table just really gets in the way of the flow (although if its just basic rifle fire then you tend to just hold the 3 dice needed in your hand the whole time). The range dice is there both to give variability in range (your range is range dice+ a basic range for the weapon), and to give a short range effect (+1 if range < just the range dice). There are some very basic DMs.

For each hit you take a morale check, typically 4+ for separated unit, 3+ for leader or unit adjacent to leader. Lose 1 check and you are "broken" and pull back to cover and out of LOS of enemy, upto 12", two losses and you're dead. I found the pull-back very unnatural - from what I've read the pullback is more likely to be a Pl level thing, sections just going to ground if they are being hit and pinned. With an element now 12" behind you the Pl Comd then has to decide whether to spend a turn moving back to help them rally on a 3+, or leave them trying for a 6+, again in contrast to what I usually read of the Pl Comd and Sgt running along the line to motivate people.

Any hit means you are suppressed, so no opportunity fire, but you automatically lose suppression when activated - so if you try to suppress with one Platoon from the front and then charge with another Platoon on their activation the target is only suppressed if the opposition hasn't had an activation between them to recover suppression.

Opportunity fire works in the same way, but doesn't cause suppression which seems odd - surely its normal effect is to get a moving unit to dive for cover. It also wasn't clear to me if a unit could do Opportunity Fire and normal activation, or even multiple opportunity fires.

Anti-tank fire is a bit simple. D6 plus a range dice, hitting again on around 4+/5+. The tables give the "penetration" points and the defender rolls D6 per armour point - but saves are then a complicated none for 1s, 1 for 2s-5s and 2 for 6s. Anything not saved means KO, and a morale test if equalled.


Close Assaults

Close assaults are relatively simple, Morale check to commit, then pair off, D6 each and a couple of DMs. In practice I found that if a Platoon charged forward you'd be lucky to get 50% of the Platoon actually committing (looking for 3+ for 3 units, 4+ for the winger), which again doesn't quite seem right, more likely all or nothing as otherwise you get one section stranded - but guess that happened, just not as often as in the game? Loser takes morale checks equal to the delta in modified die rolls.


Indirect Fire

Each side gets a number of missions, no discrimination between mortars and guns. FO needs a Morale Check to call in, if successful then roll on a 2D6 table for the result, 6-10 on target, lower is bad news (delays, deviation), higher is good news (double impact etc). Very basic.


There are extra rules for things like Grazing Fire/Beaten Zones,  Snipers, Mines, Air Support, fanatical Soviets, jungle and even small boats and horses but I didn't play any of them.
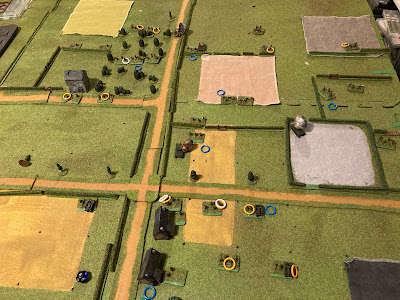

ENDEX

Conclusion


So some different ideas which is good, but some work, some don't. Trying to "house rule" it to fix is probably too big an ask as the direct fire system is just too clumsy for my liking. No issue with the multiple morale check principal though. In reality I think I'll just steal the bits I think I can work with. Overall I guess 7/10.


Tuesday, 27 September 2022

Company Megatest -- FiveCore Company Command


Had a so-so relationship with the Skirmish version of FiveCore so let's see if I get on any better with the Company version, although I'm a bit wary of a system that uses almost identical mechanics for Skirmish, Company and Brigade level combats.

Presentation

Single 62 page PDF from Wargames Vault - $7.99. No hunting through multiple supplements like the Skirmish version, all in one place and pretty well laid out. Very simple 1pp QRS.

Set-Up

Like a lot of the Nordic Weasel products there's a complete scenario and even campaign generator in the back of the rules so I used that to generate the 3' x 3' terrain and force objectives. Company Group on either side, Germans defending the village against a simple attack.


How It Played

The Cromwell advancing down the road got ambushed by the German AT gun and by a Panzerfaust in the woods and had to pull back, shaken but not out. The German MG in the house on the S of the table effectively pinned the southern British platoon at the wood line. The Cromwell put a few rounds into the house to take him out, but an artillery stonk on the German hedgeline missed, and the Cromwell was finally taken by the AT gun. In the centre the British pushed through the woods, whilst the Germans swung down from the fields N into the woods. A couple of firefights and assaults saw the Brits as victors, although a lone German squad managed to keep the reserve platoon pinned back. The Germans tried to push forward again in the S, a Panzer coming up the road getting hit by the last Cromwell. The German infantry were luck with the Brits rolling a Scurry round as they legged in across the field. They made it to the hedgeline and into close assault for no loss, forcing one section to withdraw. The British on the N side were making their own flanking action rather than taking the village head on, but both sides were at 7 squads, 1 above the morale threshold and we were on turn 10 (no idea how you're meant to do it in 5!). Then the Brits rolled an order change and higher command obviously felt they were too spent to take the village and ordered them to go firm around the village and woods. All over and even honours.

ENDEX


Rules Impression/Overall

Way better than last time. Yes it's very abstracted but it moves along quickly, is internally consistent and works and all the extra bits generate a good narrative. Perhaps not the ruleset I'd play for a more analytical game (been reading too much Jim Storr) but for a fun game it's probably hard to beat.

Perhaps the mechanic is less suited to Skirmish where you (well I) really do want something a bit more gritty, and having abstracted it may well be that it works OK at Bde level as long as the terms for results are changed - will have to see in a couple of years when I get round to the Bde test. I could see it as an interesting alternative to the Megablitz/Division Commander type portable wargame rules.

Probably 8/10, even 9/10 on its own terms (somewhat better than the 5-6/10 last time!).


Wednesday, 31 August 2022

Company Megatest - Panzer Grenadier Deluxe


Time to get David Brown's Panzer Grenadier Deluxe on the table. I've always thought his General de Brigade a solid set of rules, and I'm keen to try O Group, so be interesting to see what this older set is like.

Presentation

242pp hardback book with lots of model pictures and historic photos. 4pp QRS at the back, a 1pp play aid and 1pp or markers/templates. Pretty logical layout but pretty chatty and possibly broken up into too many chapters.

Set-Up

Same as for the Crossfire test. Germans Coy+ deployed ahead of and behind the river and bridge (top of photo above), and British with 2 Coy+ advancing from the bottom.


Finally clearing the R field

How It Played

The Cromwells did a bit better this time, not only taking out the PIV on the ridge line but also chasing the Pak back from the fiver, and then taking out the second PIV, all for one damaged but not KO'd Cromwell. With the ridge clear B Coy made better time down the L flank, but 1 Coy caught it badly both in trying to get to the field in front of the bridge, and to the one between the wood and the stream, but both positions were eventually taken by 1 Pl and 2 Pl of  A Coy were fairly spent.. Both sides made repeated attempts to bring in fire support, the Germans nicely catching 1 Pl as they consolidated on the LH field. As the Brits went firm just before the river they finally managed to bring the fire support in, and winning the firefight on both flank. Finally the river was crossed with key German units suppressed or forced back and it was game over.

The dismounted Carrier Platoon moves through the marsh

Rules Impression

I really liked these. The C&C mechanic was just about right, variable CP but you only spend them on the "harder" stuff. The different levels of "morale" test rather than specific damage also worked nicely, and it gave a good "company" feel as you weren't too concerned about whether units had taken x% losses, but more just were they in the fight. Likewise fire was at the # of "section equivalents" level. Fire support worked well too, although all the gunners were shooting accurately - luck of the dice. The "Battlegroup" breakpoint test for ENDEX was also nice, and a 75% first threshold meant a relatively early finish on a bad dice roll. The whole thing just hung together well.


Crossing the river

Conclusion

A few minor things I might tweak but otherwise a nice set of rules and probably better than any of the Modern ones I played. If they are still scoring high by the end of the test then I'll certainly do a Modern version. Overall 8/10, maybe even 9/10.

The Final Assault

Basing

In playing Crossfire something just didn't seem right, and PG confirmed it - my basing was hideous. In an attempt to be "flexible" and save cost I'd sabot mounted my 1p soldiers into 3 or 4 figure sabots to represent each section - but they took up way too much space. So before I do the next game I'm rebasing them (but leaving enough on 1p pieces for Pl sized games) with 3-4 figures per 4cm x 3cm rounded oblong base. Looks way better.


Thursday, 21 July 2022

Storm Over Arnhem AAR


STARTEX

Storm Over Arnhem was one of the first games I bought when I started the PhD - its area based layout just seemed spot-on for urban to me. When I set Christmas in Hell up at COW someone immediately said it reminded them of Storm over Arnhem, and everyone seems to view the game fondly. Having played it I can see why - and the heritage is certainly clear in Christmas in Hell- several mechanics are the same, but CiH adds the rubble and solo mode - of which more later.

Mid-game

The game played pretty well and quickly, about 3 hrs I think for a first run. mechanics were soon picked up, but as ever point density ruled, with a 10+3 unit limit per area there were some quite big numbers. Firing was based on attacker - defender scores and difference taken as retreats or losses. Best/worse AV/DV were used, plus +1 for supporting units.  Close combat was D6+AV > 6, so both very similar to CiH. Arty was nice and simple.

In the end the Brits put up a stiff resistance and still held most of the VP areas at the end.

ENDEX9

My big issue with the game was that apart from the map I had no feeling of being in Arnhem or even a town. If you'd replaced the map with a nice green field network it would have felt and worked exactly the same. I think there were two main reasons for this:

  • First, it drops you straight into the action late in the day - so there is no sense of the initial landings, the fight through the town to the bridge, and the fighting on the bridge - so most of the real signature events of Arnhem weren't there. When I first saw the board I thought that was where my para's would land and then I'd have some sort of break-in battle, but no, they are mainly for German reinforcements. I think to get a sense of "Arnhem" you probably need to play a larger scale game (must find one to test - suggestions?), or extend those outer zones to include those other parts of the battle.
  • Second the rules pay no attention to the urban what so ever - its doesn't matter if you're on a building square or a park square everything is the same. This is where I think CiH really shines - the rubble really gives you the sense of a town falling to bits as you fight through it, and where I think CiH v1.5 shines even further with different protective values for each area and tanks being limited as to where they can go.
So nice to see the heritage and a few bits I might re-steal (arty for instance), but otherwise I think that my CiH v1.5 is a better evolution of the model for an urban game.


Wednesday, 20 July 2022

Company Megatest - Crossfire


Finally back to the Company-level megatest, this time focussing on WW2 rules. First up, Arty Conliffe's "no ruler, no fixed turns" Crossfire rules.

Presentation

44 page black and white ruleset, lots of diagrams no pictures, glossy paper, very similar to his Shako rules. Reasonable layout although section numbering and styles could be clearer. 4pp QRS.

Set-Up

I bought the Crossfire scenario book, Hit the Dirt, at the same time so as to give me some scenarios to use for these tests. This first one was a modified version of Roadblock on Highway 120, with Brits standing in for Americans and Germans standing in for Italians. The Germans start on the top half of the table protecting the bridge and the Brits advance N from the S table edge (closest to camera).

How It Played

The Brits moved rapidly to the wood edge on the left and were then dissuaded from advancing by a Tiger. The Tiger took out the first Cromwell and then got into a slanging match with the second. On the right flank the Brits lost a section as they reached the edge of the field. The rest of the Platoon went right flanking and got into a slanging match with the German MG and Gruppen. 3" mortars put down a salvo but that didn't change things so I forced an assault which ended up with a win for each side. In the centre smoke was put down to mask the advance against the next field. The Brits leapt over the hedge as the smoke cleared and suffered suppression, survived a second round, got the initiative, rallied, fired back and got into another slanging match. Gave up at that point I'm afraid to say.


Rules Impression

I really wanted to like these rules as they are quite innovative and I think if I played them some more and in a different style I might like them more, but not at the moment. As the description above suggests I found they just kept dissolving into a slanging match. Side A would move, side B would get opportunity fire. They usually get a Suppression, so get the initiative, fire again, not get a suppression but something like a pin, fire again, miss, lose the initiative, then B would rally (or not) then would fire, again might get a suppression, then lose it before the kill, the B rallies etc etc. Whilst there is other stuff you can move in between the fact that safe moves can be as far as you like mean they're all done quite quickly and you're just down to the one or two contact points, and its simplest to just slog one out as you don't want to run the risk of missing your once chance to best the other side before they do it to you. 

Conclusion

As I say I think if I approached them with less of a "let's try and break it" attitude they might be OK, or perhaps house-rule it to avoid these boring tit-for-tats (which I've seen in other games) then things might be better. There is also the issue that as ANYTHING can move/act at any time you do have that empty paper/too many options issues, which might in some ways be realistic, but in reality you've issued your orders at the start and now every unit should be making an equal effort to implement them. So I think it has to be 6/10 for now, but a better player might be able to get it up to 8/10.

Tuesday, 2 June 2020

Platoon Mega Playtest - Summary and Roundup


So that's the end of the Platoon MegaTest - 11 different rules played out against a set of 6 inter-linked scenarios. So what are my conclusions?

Op Martlet Campaign

The Op Martlet Campaign from Too Fat Lardies was great fun and gave a great structure. Playing it By the book it would have been a real challenge as the British platoon suffered badly pretty much every time, whether it won or lost, and would have found it hard to keep going until relieved. I've got 29 Let's Go but also tempted by the The Scottish Corridor. I'd also like to do one based on the Canadians on Op Totalize.

Reviews Summary


Chain of Command 7/10

  • Pros: Good ranges and weapon balance. Shock. Covers most situations.
  • Cons: Activation model doesn't seem "real". End up gaming the CoC dice.


Bolt Action  9/10
  • Pros: Order dice and activation vs pins. Covers most situations. 
  • Cons: Short ranges. Underpowered LMGs. Too many "special" rules. Melee combat. Odd indirect fire (opponent places misses!).

KR16  6/10
  • Pros: Pretty simple. Nice activation model where hard tasks are harder to activate (eg assault)
  • Cons: Even simple tasks too hard to activate though. Damage removes pins, so better getting 1 hit not two often.

Fireteam: Modern  8/10
  • Pros: Pretty good. Nice random events on joker. Well laid out.
  • Cons: One step too many some times. 5 dice just to activate each unit!


UltraCombat: Modern  6/10
  • Pros: Very few I'm afraid.
  • Cons: 3in1 concept makes very bulky. Doesnt cover all events (most HE, smoke, etc). Confusing layout. Hestitate/Pinned/Suppressed confusion. Zero friction, but units often hesitate from hits and get stuck. 

Force on Force  5/10
  • Pros: Rules very complete, infinite fire exchanges but decreasing effect
  • Cons: Don't like variable dice type mechanics. Masses of dice. No one every pinned.Little friction.

No End In Sight  8/10
  • Pros: Best example of section leader commanding. Nice command exhaustion activation mechanic. Good under-fire morale test.
  • Cons: Too easy to recover from pin? Dice heavy on combat.

Iron Cross  4/10
  • Pros: Few
  • Cons: No penalty for over-reaching activation. To easy to recover damage. Kill in one turn mentality. Fire-React too pervasive. No smoke. Start min/maxing combats to eliminate a unit in single go.

Monty Gunner Who 
  • Pros: Nice and fast card mechanic, with gambling option! Good HE.
  • Cons: Melee and anti-tank a bit card heavy.

Contact: Wait Out 6.5/10
  • Pros: Scales to Bn/Bde at different resolutions. Covers all situations.
  • Cons: Needs better HE rules. Firepower model didn't handle small units well.


Bolt Action Reality Check  9.5/10
  • Pros: Played really well - as it should
  • Cons: A few tweaks but otherwise fine


So Bolt Action with house rule changes a clear winner, and even struggling at this scale to see why I need to waste time improving CWO. May be a different story at Company upwards though.


Friday, 22 May 2020

Platoon Mega Playtest: Part 11 - Bolt Action:Reality Check


The "pillarbox Panzer" has its target partially masked by smoke
That's all the rule sets I want to test, so as a finale I played Bolt Action again but with various house rules to hopefully give more realistic ranges, better balance between rifles and MGs, and fixes to indirect fire and smoke amongst other things, I've christened as Bolt Action: Reality Check.


Presentation

3 sheets of A4 QRS covering pretty the whole of the BA rule book and incorporating my changes. Hardly needed to check the real rulebook at all.

British advancing in line from top to bottom


Set-Up

Operation Martlet Scenario 6: The Last Ditch at Ruaray, the final Op Martlet scenario, again with open ground to a mix of wood and buildings giving a good defensive position. The Germans lost their IG, and the Brits lot the 4th Section and UC but gained an MFC as the mortars were going to come in handy!

The Panzer IV lies in wait

How It Played


The Brits just went for it initially, No. 1, 2 and 3 sections in line abreast, moving rapidly across the open ground so they managed to get rounds on target in their first turn. It was then a slogging match, each Section paired against a German Gruppen.  The Cromwell came out to give support, and Panzer IV countered, and got its tracks blown off for the privilege - but became a very useful turreted strong point. Despite smoke coming down No.1 Section began to suffer the most and soon routed, followed by No. 3 Section. The Germans were taking some losses, but had the benefit of cover. With only No.2 Section left and that suffering the Platoon was pulled back. Round 1 to the Germans.

Smoke on the crossroads doesn't save the Brits


The Company commander still had to get his objective though, so the Mortars put down a round of fire on the German position, putting 2-3 pins on most units, and killing the sniper hiding in the farm attic. No. 2 Platoon was then sent forward, again rapidly moving across ground in line abreast and into rifle range. The weakened German Gruppen had to spend a turn recovering pins, and given the order of the dice this meant the Brits got 2 rounds of fire in before the Germans could respond. Again the weakness of the German Gruppen was telling as they couldn't inflict the same damage as the brits, despite taking No. 2 Section  Commander out. 3. Gruppen on the German L was first to go, then No. 2 Gruppen fled, and so finally the Zug pulled back, the Panzer IV firing HE at No. 1 Section which had gone to ground behind a hillock to cover the withdrawal. Game over, Campaign over, the Brits had got the the Ruaray cross-roads on the second try.

No. 2 Platoon moves in to clear the now empty crossroads as the Germans exit stage right

Overall

This played really well. The openness of the terrain meant that it was lacking some of the manoeuvre of the first Bolt Action game, but all the results seemed realistic, and 2 Platoons to unseat 1 defensive Platoon seems reasonable. All my changes worked well too, and this has certainly ended up for me as my go-to Platoon set. Next to try it for SF and Modern, and then next year at Company level. I'd give it 9.5 I think.


Friday, 15 May 2020

Platoon Mega Playtest: Part 10 - Contact: Wait Out!


Having ripped everybody else's rules apart, time for my own!

Presentation

Although I have a 43 page A4 rulesbook (few photos) I played exclusive off the 2pp A4 QRS.

Set-Up

Operation Martlet Scenario 5: Winning Your Spurs again with a mad advance across open ground.


How It Played

No. 1 Section on the left (fm British), No. 2 Section on the right. As No. 2 Section got to about 100 and crested the hummocks, failing to spot the 2. Gruppen in the hedgeline, 2. Gruppen opened fire and wiped out No. 2 Section (they got 3 activations - one for reserved overwatch, one for normal that turn, and one early next turn!). The Cromwell and No. 4 Section moved up to replace but the Panzer IV cam out and after Panzer and Cromwell bounced a few shells off each other it was the Cromwell that took a fatal hit.

On the N flank No.1 Section went to ground behind the hummocks as soon as it came under fire - suffering far less than No. 2 Section. Even with No. 3 Section and the UC coming up in  support the German defensive line was going to be a tough nut to crack and so the Pl Commander lost patience and called in an artillery barrage from the Battalions Direct Support battery. Couple of turn later it arrived and although slightly long, decimated (accurate in this case) the German position, 1. and 2. Gruppen gone, 3. Gruppen badly mauled and the Panzer button-down. The Brits could have walked onto the position but I called game over.

Where did all the Germans go?

Rules Impression

I certainly have more DMs than the other rules tested here - but not too many I think - and the niceties are there to cope with systems right up to 2020. I did realise I was missing rules for direct HE, but everything else was covered with random activation, randomised movement if running, and smoke.

But it didn't feel as good a game as my last 1985 outing of them. Partly the scenario is a real tough one, but also this was PL+ where as that was Bn+, and it was hard to cope with the fire factors at bolt-action rifle group scale, and the 30m grid seemed to make a huge difference when the HE came down.

In terms of that barrage though a Bolt Action one would have covered a similar area, and seeing as I rolled double + three times (so 1:9 chance three times) I'd have had 6s all the way through on BA - so probably a similar result (although may have been in pins and rout, not elimination). Also just thinking of the rec outside my old house which is a similar size (~ 200m x 150m), having a platoon lying there and a 25pdr battery shoot arriving in the field I can believe that not many would walk away - so maybe not as off as it seemed.

What I didn't try was shooting for suppression - doing a quick check on that No.1 Section could probably have readily got suppression and the odd damage, so No. 3 could have charged through, so it may have been possible.

At the end of the day though with a British Pl going 1:1 with a German Pl in defence and no cover the German's are pretty much bound to win without some deus ex machina!

Overall

Not as good a run out as usual for CWO, but they are really more intended for Company up (that's my excuse!). Looking like Bolt Action - Reality Checked might become my preferred Pl set, be interesting to see if I can stretch that up to Coy in the next round. Overall, a disappointing 6.5/10 I think.


Saturday, 9 May 2020

TTS - Bolt Action Trial Run


Nick and I finally got round to doing some lockdown wargaming last night - and in honour of VE Day decided to give Bolt Action a try on Tabletop Simulator.

It's a credit to the TTS system that Nick hadn't played Bolt Action before, but since TTS is "just" a table top simulator I could walk him through the rules just as though we were playing over a physical tabletop. We used Zoom for the audio so I could guide him through the "find a server" process, and we stayed with Zoom through the game.

This was very much a learning by doing game, and was only my 2nd BA game, and we are using the first draft of my BA house rules - Bolt Action Reality Check (BARC). I could even use TTS's PDF feature to put the rules in there for him. We got through couple of turns pretty well - just the armour facing off, and we'll continue with the infantry fight hopefully later in the week.

It must be said that this particular table (Normandy Farm) looks absolutely stunning and kudos to whoever did it. The pics of the figures moving through the long grass look almost realistic (real world, not wargames table), and there's no argument about line of sight when you can zoom into eye-level with a figure! We're also playing on a 3" grid (my standard for BARC) which removes any measurement which may slow things down a  bit more in TTS.

Anyhow, here are some pics form the game so far - reinforced Pl on either side. I've shrunk the figures ( from a TTS BA "pack") down from ~ 30-40mm to 20mm.

Brits advancing through long grass to the hedgeline

Long shot of the table from the German side
 
Brits reach the wall. Dice nicely for scale. Great "sculpts" too


Nice shot showing the way the ground clutter hides most of the troops 


Germans emerge from the lane - not Brits just visible top left - got LOS then!


Thursday, 7 May 2020

Tabletop Simulator


One of my aims during the lockdown was to get some remote wargaming done, as well as solo and campaign gaming. I've cast my eye over virtual tabletops (VTTs) in the past, mainly 1st gen like Vassal and 2nd gen like Roll20, but those are all very much 2D platforms. Tabletop Simulator (TTS) and Tabletopia are very much 3rd Gen and 3D based - although still short of my ideal 3D/VR set up - see http://newconverj.blogspot.com/2019/11/virtual-reality-wargaming.html.

We had a good game of Codenames at work on TTS for a virtual going-away do, and I started looking at what proper wargaming kit is available - initially for WW2 and Napoleonic.

For WW2 there's quite a bit of Bolt Action stuff - which is ideal given how well its scored in my tests. But of course since this is a VTT rather than a game platform, the models and just models, so you can play any rules you like. I've collected all the models and gizmos I need for a game (models are probably bigger than 28mm), and so just need to give it a go.


I've spent a bit more time getting the Napoleonic side sorted. Command and Colours seems to dominate (the inevitable equating grids with simplicity) but there are also some "Black Powder" armies which give a good range of nations but have some odd gaps and oddities (all gun crews have sabers drawn) - but of course these are all free and done for love so shouldn't criticise!. Again figures are more like 40mm, so have been painfully through all the British and French figures I could find and reduced them to 20mm and rebased them (virtually) for SLS. I've also uploaded some activation cards, and created the SLS dice - using the custom component options.


To move the troops around (typically 6 bases per unit) I've made some semi-transparent movement trays, and the figures "stick" to them nicely. Only issue is you can't rotate the tray - if you do the figures stay facing forwards! That's really the only glitch.

French line ready to attack, Bde cards out for reference


So all ready to go and hopefully Nick and I can find time over the next week or so to give it a try.


Highlanders wait in line to receive the French attack

The Household cavalry rests awaiting orders

Oh yes, if that backdrop looks familiar it is Hougoumont. I took some 720 degree photos when I was staying there with Nick and Alan a few years ago, and they import straight into TTS as a backdrop. So we can do our Napoleonic wargaming inside Hougoumont, or even out on the field of Waterloo itself!


Platoon Mega Playtest: Part 9 - Monty Gunner Who?


This was something of a late entry being a set of private rules developed by one of the guys in the ACP164 campaign which he has graciously let me playtest. I'll only post this if he's OK with it.

Presentation

29 page word document. Simple layout, no pics, but it is a private set so same state as most of mine. Sensible structure though.

Set-Up

Operation Martlet Scenario 5: Winning Your Spurs. This is a delaying action with the Germans holding a shallow spur line and the British advancing across mostly open ground. I randomly added some of my felt "humps" which block line of sight for infantry but not for tanks. Both sides are reduced in force from the previous scenario, the Brits losing the 6pdr (no great loss) and the German's the Pak (but keeping the IG).

A pretty empty table - Germans at the bottom end

How It Played

The Brits went for a 4-square approach, 2 up, 2 back, either side of the road. The Germans waited til thee Brits were in close range and then 1. Gruppen in the hedgeline on the N side of the road opened up. No. 1 Section went to ground and the OC brought in smoke to cover them. Meanwhile No. 2 Section moved forward S of the road and came under similar fire from 2. Gruppen. The Cromwell moved up to support No. 2 Section but the Panzer darted out for cover, and tried to get a quick shot in before the Cromwell but failed. The Cromwell fired and hit the Panzer IV tracks, and a second shot took it out completely. Meanwhile No. 2 Section Gun Gp and the UC Bren team (now midway down the road) concentrated fire on 2. Gruppen MG team in the copse and eventually silenced it.

The Panzer IV moves up to engage the advancing Cromwell


With more progress being made on the S side No. 3 Section was switched S, and supported No. 4 Section who were passing through No. 2 Section to assault 2. Gruppen. This must have taken the Brit OC's eye off the ball as he forgot to stoke the smoke, and as it cleared the IG and 1. Gruppen hailed fire down upon No. 1 Section who were routed.

Fresh smoke to protect a shattered No. 4 Section as 2. Gruppen pull back


Back on the S No. 4 Section took a lot of damage on the way in on their assault, but just got the better of the melee (although on checking the rule both sides may have eliminated each other!), pushing 2. Gruppen back behind the spur. 3. Gruppen had swung round to the road to protect the German L flank, 1. Gruppen considered a similar swing to come down on the flank of 2 and 3 Sections, their own front now bring clear, but initially thought better of it.

No. 4 Section just didn't have the oomph to push on to the road, and fire from 2. and 3. Gruppen was enough to force them back to the shelter of a hummock. 3. Gruppen pushed their LMG team into the copse, but the Cromwell and No. 2 Section soon took them out. But 2. Gruppen then snuck a Panzerfaust man into the copse who, despite taking hits, managed to put his round through the hull of the Cromwell, effectively putting it out for the rest of the game.

With 1. Gruppen finally swing round and bringing enfilade fire down on the UC and No. 3 Section, and the IG also putting HE into No. 3 Section the British situation was looking dicey and although neither side had reached breakpoint the Brits decided to call it a day.

Rules Impression

The main rules mechanic is a deck of playing cards, with red=good, black = bad. For shooting its typically 4 cards, +/- extra cards as "DMs", and a hit for each red, with saves likewise dependent on drawing reds from 1 or 2 cards.  A really nice and fast mechanism. Activation is by a unit deck - IABSM style, and there's also a hand of 3 "special action" cards for commanders to use and refill. On activation a unit can either take 1 activation, or gamble and draw 2 cards and get an activation for each red - there's even an option for 3! Damage is in two stages, hits that reduce capability, but once they are "full" you start taking morale hits - which might cause a fallback or worse, and once a threshold is reached (typically 4 hits and 4 morale for a rifle group) then the unit is destroyed.

Where the rules fell down a bit was in tank/anti-tank fire. It roughly 5 cards to hit, then 5 cards to penetrate, 4 cards to counter penetrate, 5 cards to locate the hit, and 5 cards to assess damage - 24 cards to end up with just a bent sprocket wheel! Melee is similarly card heavy. In contrast HE is spot on, with cards giving accuracy and distance.

Overall

The core mechanic is really good, and very tempted to use it for some of my own rules. With some mods to the anti-tank and melee it would make a superb set for newcomers, or oldsters fancying a different sort of game. Seems inappropriate to give it a score since it's someone's own set, but with a few tweaks I think I'd rate it as at least as good as Chain of Command.


Thursday, 23 April 2020

Platoon Mega Playtest: Part 8 - Iron Cross


Presentation

32 page glossy softback, of which the core rules are only 13 pages. Decent pics, diagrams and layout. 1 page QRS on back cover and as download PDF.

Set-Up

Operation Martlet Scenario 4 - Striking at St Nicholas. Germans with IG37 infantry support gun as before. The rules have no explicit scale, all long-arm weapons have unlimited range. IAWs have a range of 8"/20cm - so assuming ~100m gives 10cm = 50m, but that then seems too long for the rest of the long-arms. Close (or is that effective) range is 12"/30cm, which if assumed as 300m, gives 10cm = 30m.

How it Played

View from German lines
Same British game plan as before. No.1 and No.2 Section headed off through the wood on the L flank, while No. 3 Section took the open ground on the R flank, with No. 4 Section in reserve. No. 3 Section soon came under concentrated fire from 2. Gruppen (centre) and 3. Gruppen (British R) which wiped it out. No. 1 Section made it to the edge of the wood and was immediately engaged by the IG which wiped out their LMG team. The Cromwell came forward to try and suppress 2. Gruppen to clear the way for No. 4 Section. It was out of Panzerfaust range but the Panzer IV came forward, and it got hit by both the Cromwell and the 6pdr, the 6pdr delivering the final blow which knocked it out. The Cromwell cleared the hedgeline of 2. Gruppen MG34, and 1.Gruppen MG34 in the farm roof, clearing the way for No. 4 Section.

No. 4 Section moving forwards. Note new dead 10mm models!

Unfortunately No. 4 Section still caught fire from the rest of 2. Gruppen and lost their rifle team. The LMG team made it to the hedgeline though.

At the farm No. 2 Section finally made it through the wood unmolested and assaulted 1. Gruppen in the farm. After several rounds of melee 1. Gruppen won and No.2 Section lost is rifle group.

1. Gruppen redeployed to the N of the farm. No. 1 Section in distance.
The Brits were now perilously close to their breakpoint. 3. Gruppen and the IG turned S to engage the UC and Bren team which had snuck up on the far side of the hedge S of the road, and in a brief exchange of fire the Bren team was gone, British breakpoint reached and it was game over - a German victory!

Rules Impression

I'd heard good things about Iron Cross, particularly the activation system. I'm afraid to say it didn't work for me at all, and even seems the most broken of all the ones I've tried so far - mainly because you start min/maxing the game mechanic rather than "playing the period".

Each side gets a bunch of activation tokens, effectively 1 per unit plus 2 for HQ. But those tokens can be allocated to any unit. After allocating the unit actually activates on a 1+/2+/3+ incrementing D6 roll, based on both previous activations and morale/damage hits. So far fine. But 3 things to me then wreck it:

  • There is no penalty for failing the activation (other than loss of token) so you can keep going it if important. Other rules with this system tend to have you lose initiative.
  • Units need 3 (small) or 5 (standard) morale/damage hits to be eliminated. Recovering hits is relatively easy (and not subject the same incremental challenge). So in reality you aim to get all 3/5 IN A SINGLE ACTIVATION.
  • So once you start a unit firing and inflicting damage you keep going. Any infantry unit probably averages 1-2 hits an activation, so in 3 you're probably done. 

As a result I found each turn tended to resolve around the destruction of one particular unit. The defender does get the chance for reactive fire each time - but they are on a 3+/4+ model, and with each hit that becomes harder. Also with almost every firefight becoming two way it seems to break the activating players flow (deliberately?).

Smoke rules are very simple (the 2" landed smoke just right turn after turn, blinding the IG), and there are no indirect fire or spotting rules. No building rules (just cover) and melee is just another firefight - hence it dragging on.

Overall

Not for me, although other people say they've got good games out of it. I've got Seven Days to the Rhine to play later, so I might watch a few video playthroughs before that to see if I get anything seriously wrong. But on this experience overall 4/10.

Monday, 6 April 2020

Platoon Mega Playtest: Part 7 - No End In Sight


Presentation

92 page PDF by Nordic Weasel - available on Wargames Vault for $12.99, minimal images but fairly sensible layout. About 1/3rd is campaign rules. No QRS.

Set-Up

Operation Martlet Scenario 4 - Striking at St Nicholas. The Germans have now added an IG37 infantry support gun. The rules have no explicit scale, but all long-arm weapons have unlimited range, so probably more like 10/20m per square than 30m. No close/effective range either. Although designed for the Modern period the rules include bolt-action rifles and Brens, so no conversion needed.

How It Played


No. 3 Section started off, patrolling along the S flank til they got hit by 3. Gruppen on the hedge line. One man down, adverse morale test and scurried back to where they came. Cromwell came forward to support, put some MG and 76mm HE into the hedge-lines, but really only suppressed. The Panzer IV seized its chance, did a quick and long drive into a shooting position and disabled the Cromwell tracks. The 6pdr returned fire and took the Panzer out. A Panzerfaust team in the hedges tried to take the Cromwell but it was front on and the round bounced off.

Meanwhile No. 1 Section was heading across the N flank through the wood, but as they approached the farm came under sustained fire from the MG42 in the attic rooms. Before long the whole Section was suppressed - with the IG pouring fire in from the flank not helping.

The Pl Comd finally called down smoke in the S and No. 4 Section went to help No 3 Section which had still been pinned. No. 4 was slow off the mark though and No. 3 was still not at the enemy by the time the smoke cleared. The static Cromwell hoped shoot them in though and a handful of No. 3 Section finally made contact with a handful of defenders. The Brits won and the Germans pulled back.

Meanwhile No.2 Section had also been advancing through the woods, and with all the fire being directed at No. 1 Section was able to get up to the farm walls without casualty (a short range German shoot missed totally). Grenades were lobbed in, Germans stunned, and No. 2 Section stormed through the openings. The melee wasn't as quick as planned but finally the Germans gave way, and the MG42 team and Zug OK fled the farm.

End game time, No. 2 Section turned its fire S on 2. Gruppen in the central field, with No.4 and No.3 Section also putting in fire from the flank. 2. Gruppen struggled to get people out of pinned, especially those caught in the open, and finally No. 4 Section stormed into melee with them and it was game over.

Rules Impression

No End In Sight has a really cracking command and control system - probably the best yet for giving you a section commander's feel for a Platoon battle. Sides alternate activations, and can activate one commander, who gets D6-Stress action points, each of which can activate upto 3 men (if close) or remove 1 pinned, and a few other things. But each activation gives the NCO one more Stress, and if they role modified 0 or less they are "exhausted" and have to wait the next turn. The next turn only happens when everyone (voluntarily or mandated) is exhausted, and 3 Stress are instantly recovered by NCO.

The next effect is that you tend to focus the battle on one bit of the field at a time, with opposing NCOs fighting it out, and spending an increasingly meagre AP as best they can, removing a pin here, pushing a couple of guys forward there - all within the context of the larger game. Excellent.

The under-fire Morale test was nice - forcing No. 3 Section back with the first shots, and as the rules warn whilst units are often pin soldiers are more rarely killed than in other rules. I did find pinning easy to recover from though - although I suppose since the NCO is using activations up to do that they still can't then do much (can't recover pin and fight in same activation).

There were rules for most situations in there, including lots of building and vehicle ones. However some had less depth so you might be forced to improvise. Nice grenade rules (luckily none of No.3  Section's bounced off the door frame?). The tank combat rules have an annoying "silent" result on a roll of 4 which is meant to keep people guessing and require a reroll next turn, and I just kept rolling 4s!

The core combat system is dice heavy, shock dice per man, +2 for LMG, then half that many dice for Kill (a Nordic Weasel trope), so that's 15 dice for an 8/9 man section, then need to reroll Kills if in cover. Not my ideal, esp with 2 different types.

Overall

Whilst the combat mechanic isn't my favourite the activation model made this a really nice game. Very keen to try it as an option for my Bolt Action Reality Check. Overall 8/10, edging a 9.