During a wonderful week's holiday up in the Forest of Bowland ( walking in the day, gaming in the evening - mostly Britannia) I managed to fit in a solo play of the old SPI Seelowe game of the planned invasion of the UK by Germany in 1940. Since I grew up around Dorking in Surrey, right by the Mole Valley gap my childhood walks were always full of pill boxes, and ever since the Battle of Dorking pamphlet of the late 1800s the area has always been seen as a strategic focus for any invasion.
I decided to play the September Navy scenario as this was the most realistic in the game. The invasion is focussed on the ports of Kent and Sussex initially, and comsists of a small early assault phase followed about a week or so later by a moderate main landing force. This is not on the scale of D-Day. It is assumed that the RAF was eliminated in the Battle of Britain, and that the Royal Navy has been locked out of the Channel. The Luftwaffe is flying regular interdiction strikes from France - but its range is limited, and with daily rolls for weather the ability to actually use the Luftwaffe and land troops can be a pretty hit or miss affair.
The write up was done pretty much turn by turn, and I haven't made any attempt to tidy it up - but hopefully it gives you a flavour of the game. Total playing time was about 4 hours.
Turn 1
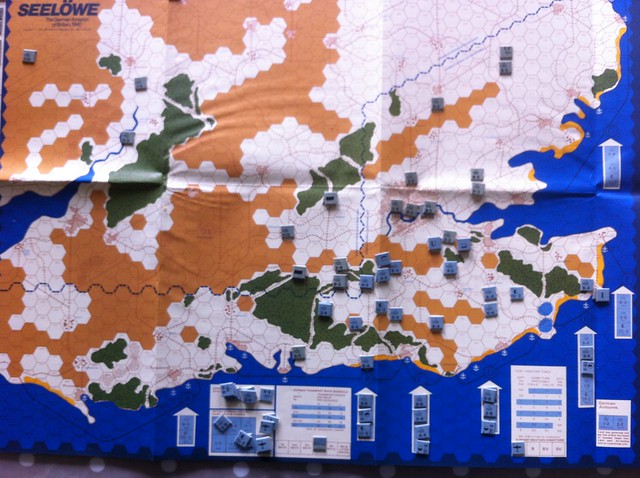
German landings at Brighton, Eastbourne, Hastings, Folkestone and Dover
Coastal opposition eliminated. 2nd Div deploys towards Chatham
Turn 2
British slow to mobilise. 29 Gren Regt keeps 19 Div holed up in Dover. 51 Gren Regt protects L flank at Worthing. 28th Amphib Tank Regt siezes ports along the coast. Main thrust towards Dorking, secondaries on flanks to Maidstone and Guildford. British 1st Div under air attack at Redhill, and 2nd Div destroyed NW of Maidstone. One RAF fighter group lost in air attacks. Rough, landings only at ports.
Turn 3 Rough seas still limit landings, slow expansion of bridgehead. leading forces pushing in to Surrey
Turn 4 Bad weather delays reinforcements and grounds air attacks. GE attack on 1st Div delayed.
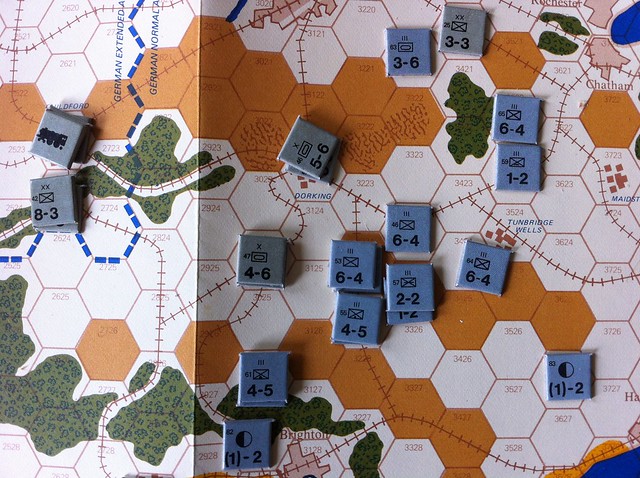
Turn 5 Still rough but skies clear. Luftwaffe interdicts 1st Div and 47 & 48 Armd Bdes at Newlands Corner. Combined assault by 4 Regts and Para Bns destroys 1st Div (and Dorking) for the loss of the paras and a Regt. A proposed simultaneous assault on the Armd Bdes failed to materialise. 64 and 65 Gren Regt close on 25 Bde E of Croydon ready to open the way to the city where defence Brigades are still not fully mobilised.
Turn 6
German assault takes out the 47 and 48 Armd Bdes. Supply issues prevent assault on 25Bde. Germans now have a clear route to the W of London, and in the east are only 3 hex away from Central London. The first wave of the major GE reinforcements are embarked, and the British are belatedly mobilising some of their more far flung troops in East Anglia, Wales, and the West Country.
Turn 7
Air attack on 42 Div S of Guildford fails and one Sqn lost, operating at extended range but despite 8 Sqns on task. Successful interdiction against 7 Div moving SW fm Chelmsford. 19 Div in Dover finally falls, but takes 49 Regt with it. The attack against 42 Div goes in despite the failure of air support, and destroys the Div but 42 and 51 Gren Regts lost. 64 and 65 Regt push 25 Div back, and it withdraws across the Thames. The Germans are only 3 hex away from Central London, and despite forces massing in the Chilterns the situation for London is looking grim.
Turn 8
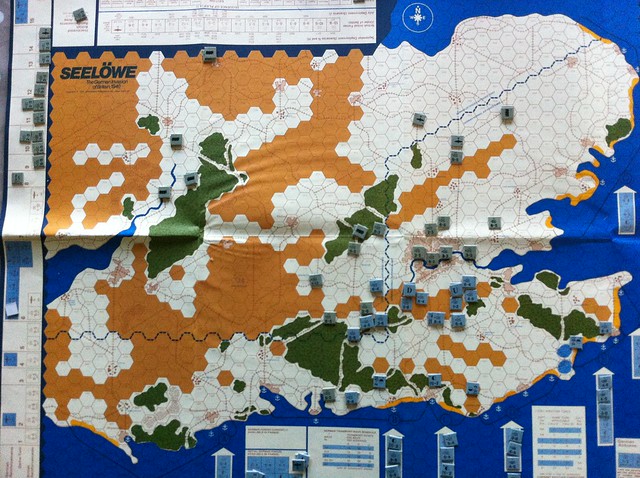
The German strategy is to obliterate London before clearing the rest of the country. Weather is storms which delays landing of the main wave of reinforcements and renders the Luftwaffe useless. UK 5 and 16 Div destroyed defending Guildford, 55 and 61 Regt move in, whilst 17 Pz Regt protects the flank from 6 UK Div and 1, 15 and 16 Pz Div sweep on to West London. Other German forces advance on a broad front to the outskirts of London ready for the bloody street by street fighting. A second wave is moving up from the beaches.
Turn 9
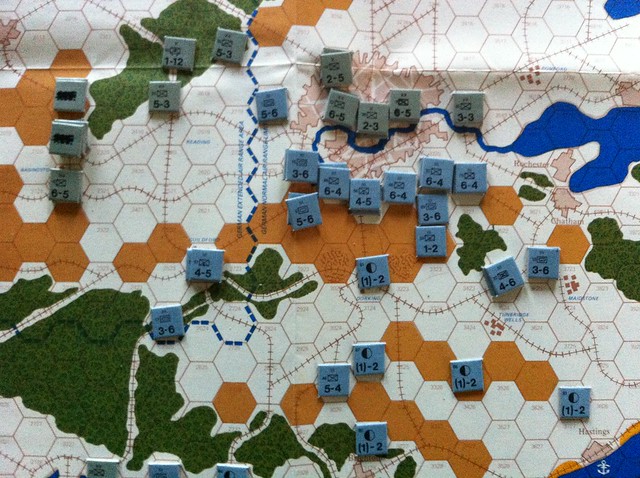
The Germans attempt a first assault across the Thames but are repulsed. 23 Div in Chichester also holds out. British forces mass in the Chilterns ready for a potential counter-attack to relieve the pressure on London. weather still grounding a/c.
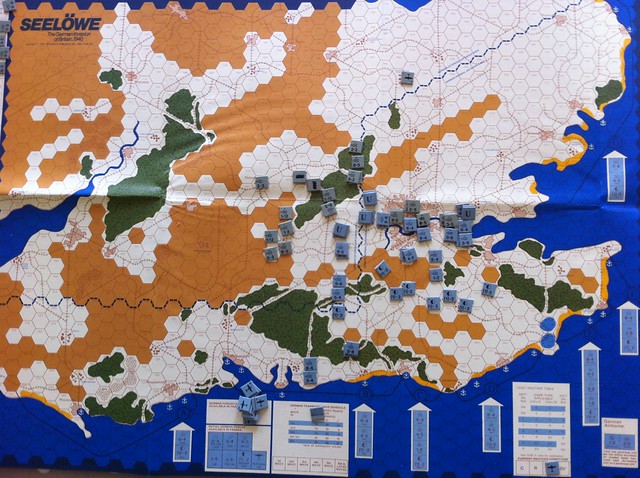
Turn 10/11
A/c still grounded. Germans force way across Thames in central London but then held. Also across in Thames estuary. Supplies hampering exploitation in E. British Home Guard active and making fighting in London hard, several units unable to get in on W. British forces steadily building in Chilterns bipartisan not enough concentration to take on German screening force.

Turn 12
Luftwaffe is flying again but loses on a/c in attempt to disrupt units around Basingstoke. GE destroy 5 Div W of Basingstoke, and push further across Thames estuary to complete their encirclement of London.
Turn 13
7 and 27 Divs defending East London destroyed. 6 Div defending Basingstoke destroyed. Only 4 units left in London but defensive line along Chilterns steadily building and Partisan and other forces massing S of Oxford.
Turn 14
Penultimate units in London destroyed. Luftwaffe plus 50,56 and 61 Regts sp by 5 & 6 Pzr and 48 Gren Regts finally clear 60 & 63 Mot Bdes and 21 and 33 Div fm Basingstoke area, only light resistance now between them and Oxford. GE encirclement of London now complete and preparing for assault on 6 Div and 33 Bde around High Wycombe.
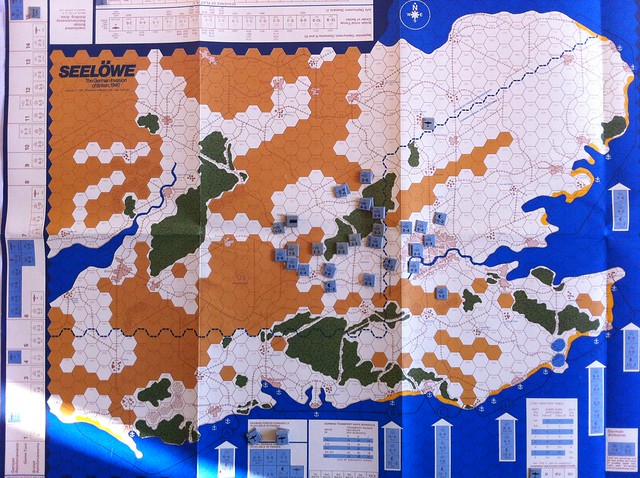
Turn 15
London finally falls as 12 Div and 17 Bde give way under increasing German pressure. The Pzr Regts are immediately dispatched to aid the assault on the Chilterns. In High Wycombe 6 Div and 33 Bde are destroyed, and NW of Basingstoke 56 and 57 Partisan are destroyed by 4 & 5 Pzr Regt. Apart from some militia units nothing stands between GE left flank and Oxford, and the remaining 6 British Divs in the Chilterns are surrounded.
This was the formal end of the game.
Victory Calculations
Ports 10
GB SP ~40
GE SP 106
>2:1
Decisive German victory
Since the Germans were so close to total domination I decided to just play out their assault on the Chilterns.
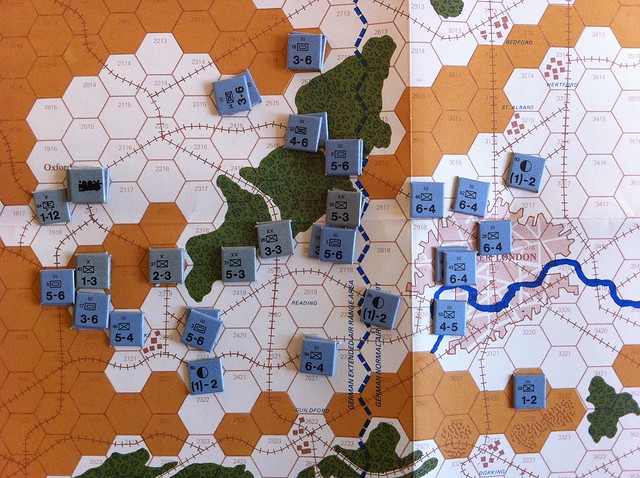
Turn 16 (extra)
Successful assaults on both flanks clear 3 British divisions from Chilterns
Turn 17 (extra)
All British forces except a Mot Inf Bde (Str 1) at Didcot eliminated.
And that was it. The rules say that normally the Germans have a hard time winning, and it's always an issue with solo games as to whether you become naturally biased to one side or another. I made some random roles to decide to strategies - for instance giving the Germans the choice of isolating London ( which I'd have done) or assaulting it (which the dice decided). The weather also frustrated German landings and air support so I don't think they had a particularly easy ride. The British just lacked a decent number of high strength combat units, and perhaps played too passive a game, defending the North Downs/GHQ line rather than trying to push forward and engage - but again I don't think in the early stages they really had the forces to do it.
All in all a fun game thought, and a nice counterpart to SPI's Normandy which I must also replay some time.
***Imported from old blog***


